The bag is becoming increasingly difficult. Having tried to saw pierce my dovetail joints I realized each indentation would have to be only as deep as the Perspex is thick...2 mm.
Not only is this an obstacle but the fact that each indentation must be near perfect to ensure that the pieces align correctly during assembly...
UPDATE;
The dovetail joints have sadly become unrealistic within the set time. I trialed making them more 'tongue and groove' joins but that proved just as difficult to measure and saw pierce.I'm really disappointed as it was a main factor of the project but due to 'technical' difficulties I'm going to have to settle for using an acrylic adhesive.
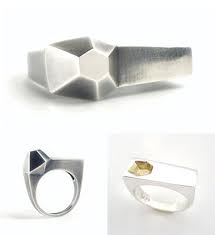
Whilst playing with it I made some small geometric objects that I feel helped me realize my concept for the final 3D project.
Tuesday, June 5, 2012
Experimenting with moulds and wax.
Having trouble with rhino I decided to make a sillicon mould of a crystal I had, to get ideas etc...
Partial Cast Piece, with two waxes and original crystal.
Third Project
I want to create something geometric, faceted and crystalline.
Carrie Bilbo.
Eli Jewellery.
Asos.
Unknown.
Initial Sketch
A preliminary drawing showing dimensions and features of bag.
at this stage I'm beginning to question my ability to accurately create these shapes in either rhino or illustrator.
Second Project
For the second project I want to make a box purse from flat perspex pieces joined together using 'dovetail' style joins...
Unknown artist.
Chanel, Perspex 'Briefcase' bag.
Dovetail Diagrams...
More Cuffs...
After getting paid I decided to source some more perspex...
Red, Yellow, Blue, transparent Green, transparent Red and Black...I wanted to experiment using different paints and different colored inks to define the etchings.
Finished Cuffs
After much deliberation and endlessly surveying friends/lovers/family and (potentially unwilling) customers at my store, I reluctantly decided to cast the shadow concept aside, or at the very least, leave it for personal exploration at a later time...
So with that safely filed away for future referencing, I settled on having the engraved design on the outer surface of the cuff. This makes it a little less water proof and much less 'mysterious shadow' but, to quote my partner "still cool I guess."
Here are some picturez...
Using the laser cutter for the second time I decided to experiment with different images incorporating text, and some that simply are just text...
Another thing I wanted to play around with, feeling slightly more confident with using the laser cutter, was the different etching settings.
Thursday, April 19, 2012
Testing...
In this image you can see the regions of the Sphenoid Bone, Mandibular Angle, Coronoid Process, Condylar and Styloid Processes are all much darker and I was really happy with the results
Since laser engraving the few test pieces I did last week, I've become obsessed with the idea of cuffs.
Cuffs.
Cuffs are what I'm going to make.
The image is 2D, and then, wait for it, I etch it and bend it AND IT BECOMES A 3D OBJECT.
This is where I encountered my second problem...
After etching, the surface of the clear acrylic that has been etched turns white. A lot of this can be removed by a good clean like I had previously done, but essentially, it remains white. So even after all my amazingly technically skilled ink work, when viewed from the reverse, the beauty, depth, complexity and grandeur of my epic skillz are now void and null...
Laters!
Some more 'images for consideration'....
Cuffs.
Cuffs are what I'm going to make.
The image is 2D, and then, wait for it, I etch it and bend it AND IT BECOMES A 3D OBJECT.
Anyhow, moving on....
Etched anatomical designs, on the inside of a clear acrylic cuff, like a shadow being eternally projected onto the skin of the wearer...
Seeing as I already had the test plates I decided to "bake n'bend" a few one night when I was bored.
These are the preliminary results.
This is where I encountered my second problem...
After etching, the surface of the clear acrylic that has been etched turns white. A lot of this can be removed by a good clean like I had previously done, but essentially, it remains white. So even after all my amazingly technically skilled ink work, when viewed from the reverse, the beauty, depth, complexity and grandeur of my epic skillz are now void and null...
Laters!
Some more 'images for consideration'....
Subscribe to:
Posts (Atom)